 Project Photofly is a free early Autodesk Labs technology preview that allows anyone with a digital camera to create 3D models from photographs. Project Photofly is two parts one the cloud computing technology and the second the desktop application named Photo Scene Editor. Project Photofly’s desktop application named Photo Scene Editor is currently a Windows based application requiring a web connection.
This post is to provide some tips and tricks to help you get the best results and understand Project Photofly. Some things can change over time as Project Photofly is a technology preview and we can post updates and changes based on your feedback, so please provide your feedback in the Project Photofly discussion forum or in an email to labs.photofly@autodesk.com.
Step One – Get Autodesk Project Photofly:
http://labs.autodesk.com/utilities/photo_scene_editor/
Step Two – Review the Project Photofly Resources:
- Watch the Photo Shooting Guidelines video (YouTube, Download)
- Review the Getting Started Guide (PDF) http://autode.sk/iGVloq
- Watch the Autodesk Labs Project Photofly v2 A to Z in 7 minutes: http://fb.me/vgyPHFJ2
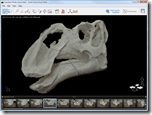
The User Interface “UI” of the Project Photofly Photo Scene Editor

- ‘Heads-up Display’ – You can set the photo lock and change the object selection methods
- Tool panels – This is your main menu.
- Mesh Quality Settings (Draft, Standard, Maximum)
- Synchronize button – will show “Save & Synchronize” if the project is not saved.
- Display options – select to display mesh or texture, photos, grid, lines, etc.
- UCS indicator, the User Coordinate System for the X, Y, and Z axis
- Image Gallery – the scrollable image thumbnails. Thumbnails will indicate status of photo stitched, unstitched, or enough points
- Navigation arrows – use these arrows to easily manipulate the view of the photos scene.
Photo Tips:
- You don't need a high resolution expensive camera. You'll want at least 3 Megapixels for best results. Feel free to submit higher resolutions if convenient, but there is little improvement above 3 Megapixels. Good focus and reasonable and consistent lighting is more important than resolution.
- Check your photos first, and remove all the bad images such as fuzzy or incorrectly lit such as a dark image in a series of bright ones. Fuzzy unfocused images could be stitched but will “damage” the texture mapping of the mesh.
- While there is no hard-coded upper limit on the number of photos, there is little quality improvement in the model above about 40 photos but computation time does increase with the number of photos. Using more than 50 photos is not recommended as there are some maximum data size limits on the server and your job may be rejected or fail. Start with a smaller set of photos as you can always add more photos later to the photos scene.
- Wide angle camera lens work the best due to the underlying technology. Do not use rectilinear-corrected image produced from a tilt-shift lens or image correction software or use the really distorted lenses like the fisheye.
- Do not manual crop or edit the photos as that could prevent proper processing of the data and result in a bad model.
- You can perform limited color processing to the images such as making them black and white to balance lighting problems.
- The surface and materials of the objects are really important. Shiny, transparent, or thin surfaces or those without unique patterns or points will not work well.
- Multiple rooms can be difficult to capture in one scene as Project Photofly must be able to follow a path of unique point locators to understand the connected spaces and that would result in a ton of photos. It would be best to do each room space individually and then connect them in another application such as 3ds Max or AutoCAD. With interior walls you can place some pieces of paper with simple pen scribbles on the walls.
- Some people have asked about using video to create the models by extracting a still image from frames of the video. While this could be done the problem is the quality of the still frames. Most have compression or tweening that affect the clarity of the image.
- Do not keep the camera still while rotating an object against a blank background. To Project Photofly the background is unlikely to look completely blank and it likely won’t work. Project Photofly is not a panoramic photo software.
- You should plan your shots depending on the subject you want to create a model from such as a person, building, or that stuffed armadillo you have on your desk. You need to balance the number of planned photos with coverage of all faces and make sure that you get the same location or point in at least 3 photos.


Photo Scene Editor Tips:
- If you take your pictures in portrait orientation you can use Windows Explorer to first rotate them to landscape before importing them. If you bring portrait pictures into your photo scene, your model may be sideways. You can use the orbit tool to get around that, however you might find that in certain circumstances you’ll need to go to Preferences and change the “Up Axis” setting between X, Y, or Z.
- You do not need to go all the way to maximum quality as standard should be sufficient for most purposes and result in more success and performance.
- Use the ALT key with the left-mouse button to orbit without having to go into orbit mode. Very useful when doing mesh cleanup with the selection tool.
- It is normal for the edges of models to be flared. You should use the mesh selection and deletion tools to clean up the edges of the model. The artifacts like flaring is caused where we don’t have enough camera angles or enough surface detail to get a good signal of where the surface is. In general the best results happen when a particular point on the surface can be seen from at least 3 to 4 different camera angles/positions and with some surface texture that can be matched and triangulated on.
- You have to refine the mesh after the initial processing to draft mode. Some are posting their videos of models to YouTube in draft quality mode when standard would look much nicer.
- Check the camera alignment by making the mesh partially transparent and selecting the entire mesh (or parts of it) and then clicking photos in the Image Gallery. When the mesh is selected (highlighted red), it's very easy to see if it lines up with the content in the photos behind it.
- When doing mesh cleanup do the following: (a) turn on 2-sided viewing, (b) turn on pure wireframe mode, (c) select a region to delete, (d) use the ALT-left-mouse-button-drag to orbit and check that you haven’t selected a region you didn’t want to before deleting. There is no undo, and often when selecting on a surface you can accidentally select-through the object to the opposite side if you aren’t careful.
- If you right click on the photo thumbnails at the bottom you can choose to just show “Unstitched Photos”, making it easier to manually stitch the problem photos out of a difficult job.
- When making a movie, you can make it in wireframe or solid mode. Produce the same movie twice and use a video editor like to crossfade the same sequence between the two modes for a cool effect.
- If you like Microsoft Photosynth-like photo navigation, after you get a stitch of your photos you can go to preferences and turn on “Lock During Photo Orbit” and then use the orbit tool to rapidly navigate through your original photos. Note you’ll need to turn off the visibility of the mesh geometry first.
- You can change your background from the default blue to black or any other colors you prefer. You can change the background color in the Preferences dialog by pressing “P” and then setting it in the Color panel.
- Press the “I” to see the photo scene information like number of stitched photos, points, and faces.
- Remove all spaces, Chinese, and all accented letters like ~!@#$%^&*() from the path/folders of your images, the name of your images and the name of your project as this can currently cause problems for Project Photofly.
- If your views seem like it is an odd perspective view or not orbiting right try this solution. Press Ctrl + Alt + left mouse button and drag down several times to have the scene far enough (angle of view decrease by zooming out). Then use Ctrl + Alt + right mouse button and drag up to approximate the scene (the point of view move by doing the dolly). By resetting the perspective, the view should look better and the navigation should be easier.
Export Data Tips:
- Exporting the DWG contains only the manual points and lines you have created not the mesh or automatic points. If you want the points in AutoCAD try exporting to the .LAS point cloud format which can be imported into AutoCAD or many other applications.
- If you want to view your 3D model on your mobile device, simply export it as a .IPM file and use the free Autodesk Inventor Publisher Mobile available for both Apple and Android mobile devices.
- If you want to use your 3D Photo Scene in a 3D animation software like 3ds Max or Maya export the .OBJ file which contains the textures and mesh.
- Share your 3D photo scenes using the .3dp file. The small .3dp file when sent to another person by email will allow them to open it in Project Photofly Photo Scene Editor and it will download the photos and mesh for the 3D photos scene. Make sure you synchronize your changes to the cloud by clicking on the “Save & Sync” button before sharing the 3dp file. If it was already synchronized, the button will be grayed out and it’d say “Synchronized.”
The most important tips are to give this technology a try, you don’t know if your object will work until you try it, send us your feedback, and most of all have fun,
Cheers,
Shaan
how may you open in the Autodesk Inventor Publisher Mobile for Android the .ipm file that i made in Photofly? the viewer dont have open option.
Alessandro,
If you place your files in online storage such as Dropbox or email the file to yourself you will get the option to open the file with Inventor Publisher Mobile.
You can share your 3D photo scene by sharing just one fiel. Here is an example: http://labs.blogs.com/its_alive_in_the_lab/2011/06/sharing-your-photo-scenes-with-just-one-file.html
For additional information on what gets placed into each export file type, see http://labs.blogs.com/its_alive_in_the_lab/2011/06/project-photofly-what-you-is-see-isnt-always-what-you-get.html.
Hello,
Thanks for this piece of advice !
A few questions, though :
– “Using more than 50 photos is not recommended as there are some maximum data size limits on the server and your job may be rejected or fail”
“While there is no hard-coded upper limit on the number of photos”
Could you be more precise ? Does it depend on wether many people are using Photofly at the same time ?
– “Wide angle camera lens work the best due to the underlying technology.”
I’ve been triying to scan with Photofly a Pediment (Le Louvre, Paris, France : http://uppix.3dvf.com/?v=img9485.jpg ) without success : I was using a 100mm lens, I guess that might be an issue… Any advice on how to shoot this kind of far object ?
I had the feeling that taking many pictures (I shot more than 200) would help, but since there is a size limit on the server side, this won’t be a good idea.
(Microsoft’s Photosynth does get a nice point cloud from my set of photos : http://uppix.3dvf.com/?v=louvrepari.jpg )
– I’ve tried a few scans in some museums, with mixed results (failures, or nice models like this one : http://www.youtube.com/watch?v=tWC4ml4k4tE ).
I have the feeling that high ISO can also be an issue with Photofly.
– “Do not keep the camera still while rotating an object against a blank background. To Project Photofly the background is unlikely to look completely blank and it likely won’t work. Project Photofly is not a panoramic photo software. ”
Would this work if the background is overexposed (you just have to use a deported flash directed at the background) ?
I was hoping to scan small objects using a macro lens (Canon 100mm macro), which by the way would also help me have a blurred background…
Thanks again for those tips !
Hello Shaan,
I did try to capture stills from a movie and I was quiet please with the fact I did not have stitch any picture. I think I had set it to capture one picture per second. Since it was not an hd camera the resulting mesh was not to great. A better camera might give better results.
But it’s worth exploring
Daniel,
Thank you for sharing your experience in using images from video.
Regards,
Shaan
Shadows44,
Thank you for all of the questions.
The number of photos is not dependant on the number of Photofly users it is just a good recommendations as too many or too little photos can result in bad or failed solutions.
A wide angel lens works best, but you could use other lenses like the 100mm.
Lighting makes a biog difference as you noted about high ISO as Project Photofly must be able to identify unique points in addition low or non-uniform lighting can result in a bad texture.
I would not suggest moving the object and instead move your photo locations and flash can cause problems with the texture mapping due to greater probability for non-uniform lighting.
These are only tips we have found using this new technology but experiment and you might find for the objects you are capturing some other tips or exceptions such as a macro to use the bokeh background to your advantage. Make sure you provide your feedback as well as share what you learn.
Regards,
Shaan
Thanks for the answer !
Looks like using a zoom lens can indeed give good results :
24 shots, using a Canon 70-200 f4 lens @100-140mm.
Probably the best result I’ve had so far.
“flash can cause problems with the texture mapping due to greater probability for non-uniform lighting.”
Sure, actually I was thinking of using a flash off-camera, and a white light tent to get an even lighting (and a white, uniform background).
A question:
In the Getting Started A-Z video it mentions shooting every 5-10 degrees and also shooting from multiple angles. But in this post you mention that the number of images should be limited to 40-50. However, shooting every 10 degrees at one angle alone creates 36 images, shooting every 10 degrees from multiple angles will quickly add up to more than 50 images. E.g., 36 shots at two angles = 72 images, from three angles will be 108 images. Should the number of shots per rotation be decreased when shooting from multiple angles?
Thanks.
I have IPM Mobile installed (Galaxy S with 2.1) and the .ipm file in Dropbox (and emailed to myself) and still can’t get the option to open it. Anyone else having problems?
Josh,
I would email feedback@autocadws.com for suggestions.
Stephen,
108 images would work but just take more time but I would not exceed that. You may find you may not actually need every 5-10 degrees depending on the objects just think of getting the same unique point in three or four photos. I would shoot less and see how that works as you can always add more photos to your scene later for more detail.
When we mention 40-50 it is a general rule of thumb for most objects to process fast and capture much of the subject.
Shaan –
Thanks for the tips. I’ve been able to create some nice Photofly scenes. When I export to Maya using .OBJ, the imported mesh looks nice, but having trouble cleaning up geometry and UV’s in Maya. Any tips on how to make the Photofly object mirror other objects created in Maya?
Thanks.
Russ
Hello,
I am testing Photofly with images taken of an object inside a virtual environment (Second Life – SL) and I could use some advice as I am having problems getting a good mesh (not well synced and much excess background material on the mesh).
It is relatively simple to take screen captured images of an object and do so at exact intervals but resolution is only about 6000×3000 pixels and yields images of about 750KB each. The texture and lighting tends to be uniform (but this can be changed).
Will increasing the resolution of the image help or changing the colour of the background? Will giving the background a texture help even if the object has little?
Since I can control the background texture and object texture, I would like to know if there is anything specifically I can do to improve mesh quality taken from captured images within a virtual environment.
Thanks,
Rob
Russ,
I am not a Maya user, sorry.
For a better model than you shown in the one image you emailed to me and simply select the medium mesh option instead of the draft in the upper left of the Photo Scene Editor. Each project is dependent on the photos taken as mentioned in the tips and video tutorials.
PING:
TITLE: 123D Catch now available for Apple iPhone, iPad and desktop
BLOG NAME: Between the Lines
Big 3D’elicious news for millions of iPhone owners! Capture 3D models from your iPhone for Free!
There is an update today to the 123D Catch Mobile app in the Apple App Store that before only supported the iPad 3, but now also supports the iPhone 4…
PING:
TITLE: Project Photofly is now 123D Catch
BLOG NAME: Between the Lines
Project Photofly has now graduated as an Autodesk product and is now named 123D Catch. This is what Autodesk Labs is for in that we place a early technology to get feedback and support whether there is enough demand and promise to make it an Autodesk p…
PING:
TITLE: Capturing the World Around You in 3D – Some Project Photofly Examples
BLOG NAME: Between the Lines
Project Photofly allows anyone with a common point and shoot digital camera to create near accurate 3D models from photographs using the power of cloud computing. Creating 3D models is almost as simple as snapping the photos.
Here are some of the 3D P…